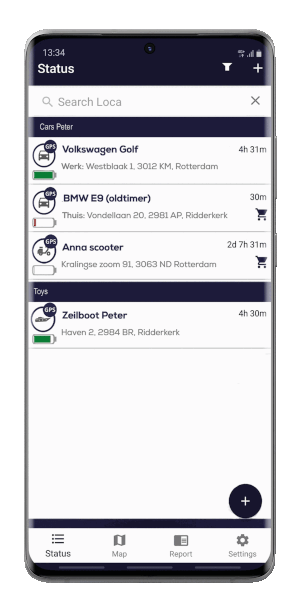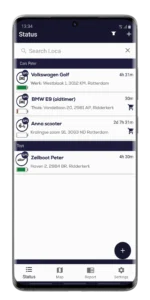
The overview screen
In this screen you will find an overview of all your units that you have added, possibly divided into groups.
You have the option to search, useful when you have many units in the app. You can also add new Locas from this screen by clicking on the  icon at the bottom right.
 With the filter icon at the top right, you can show or hide units in the overview screen.
Handy if you have units that are empty, but still want to keep them to view the history again, but don’t want to always have them in view.
In the overview of the app we show the following information about a unit:
- Unit icon with GPS/LBS indicator (click here for more info on what is LBS?)
- Unit name
- Last known address
- Number of minutes/hours since last position was received
- Battery status
- Order icon (shopping cart icon is only shown when the battery is below 20% so that you can replace the unit in time)
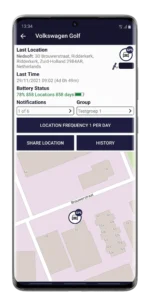
The detail screen
In this screen you can see the details of your clicked unit.
- Last Location: The address of the last determined location
- Last time: the time of the last determined location
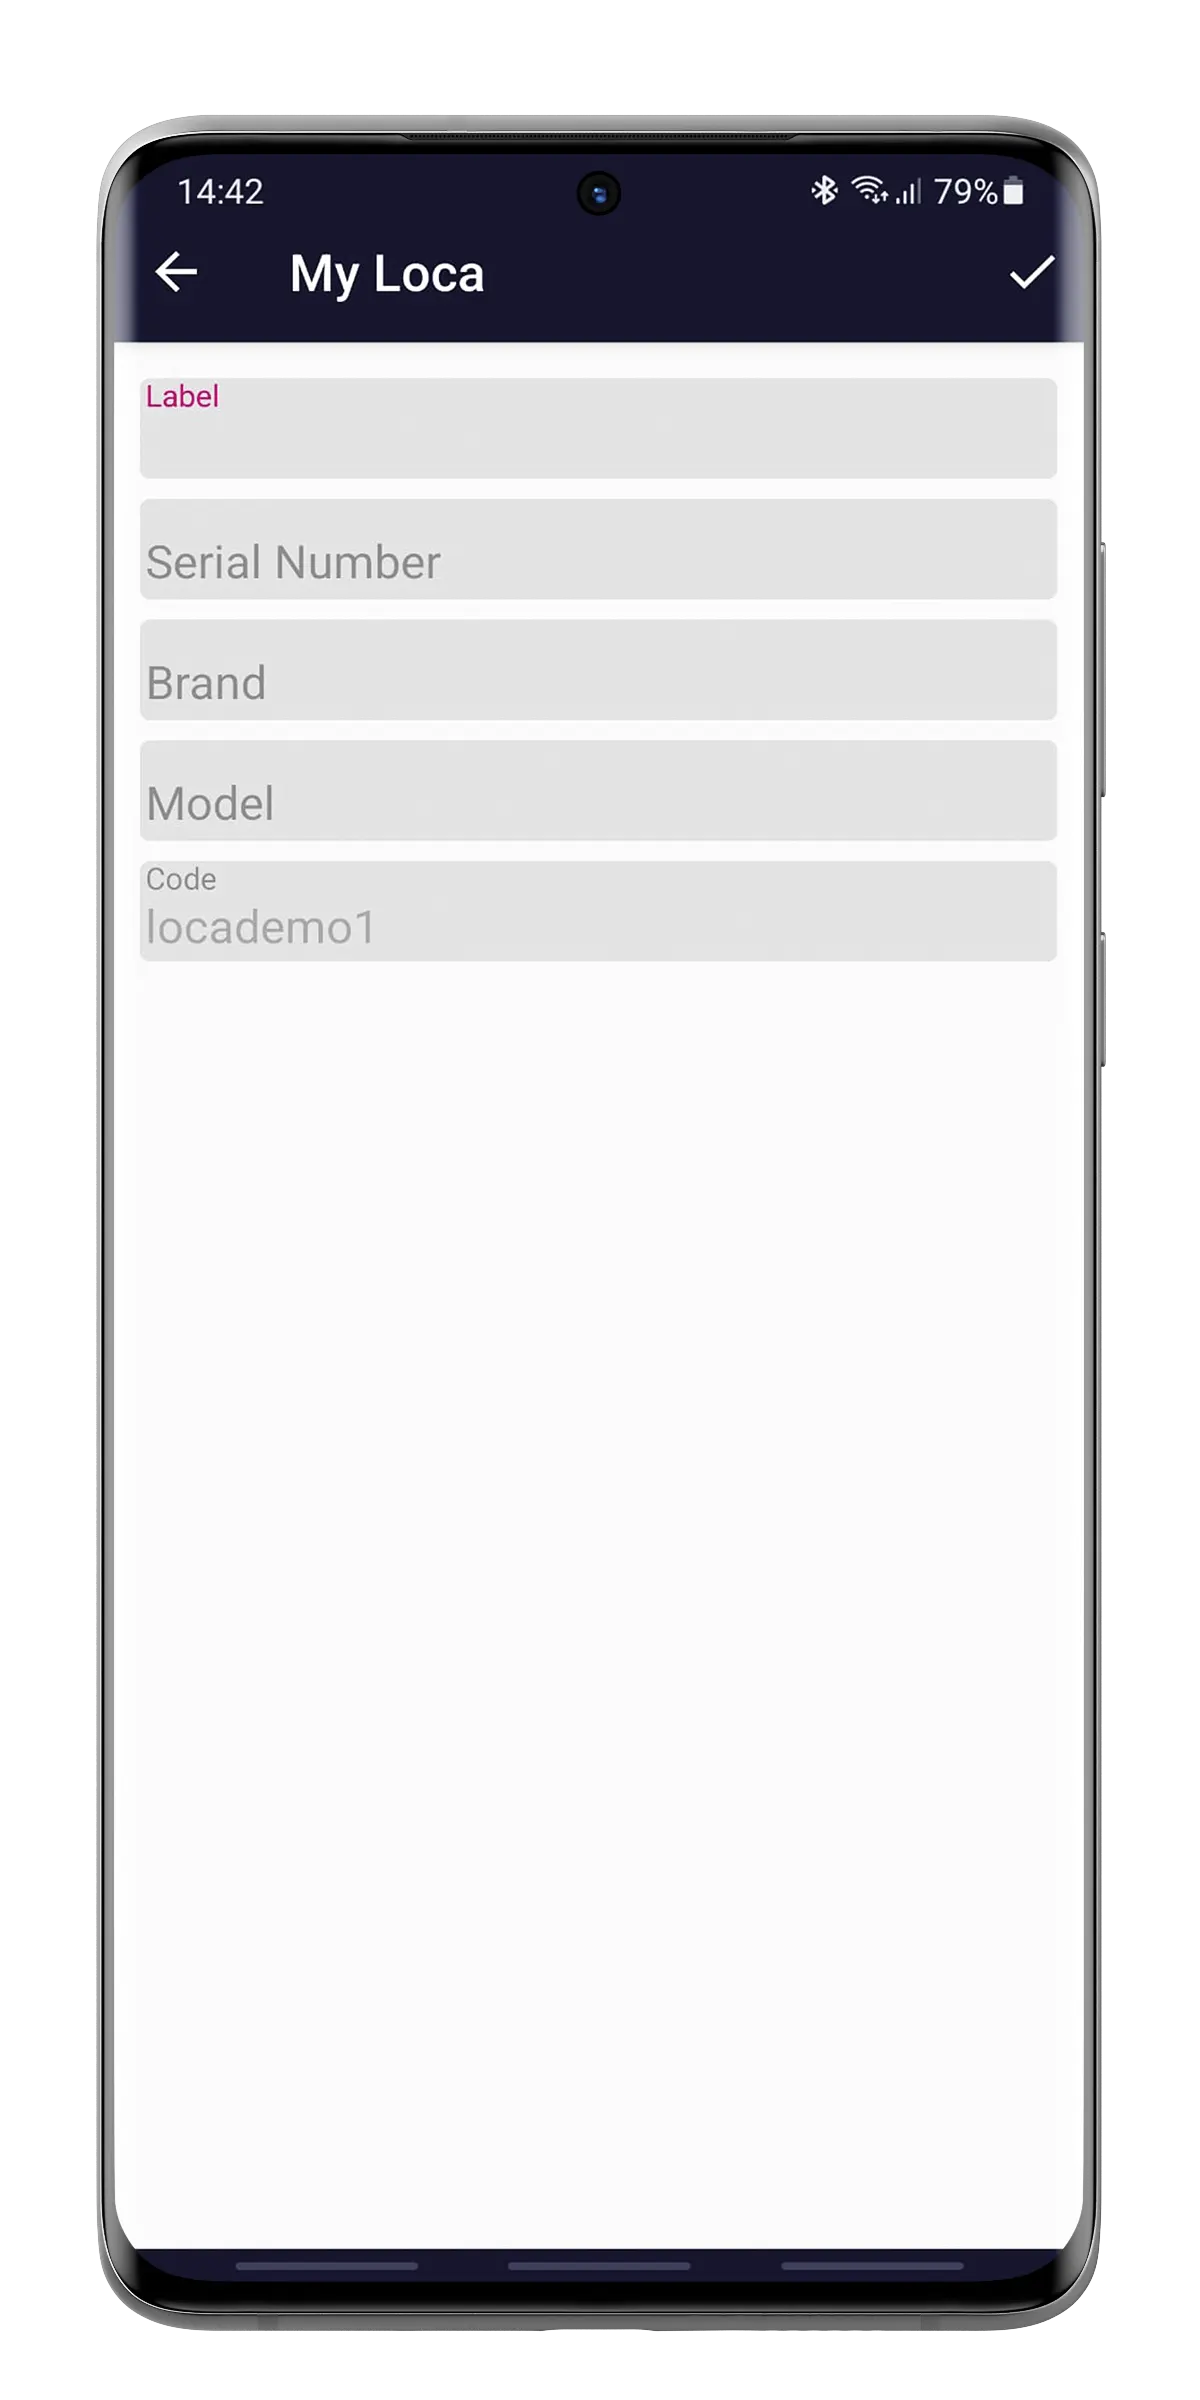
- Unit icon:
 click on the icon to change it
The icon also has the indication to see if it is a GPS or LBS location. More information about LBS can be found here.
- Signal status:
 here you can view the GPS signal of your Loca.The fuller the bar, the better the signal.
The better the signal, the more accurate the location will be.
- Battery status: indicates how many locations/days the battery has left at the set frequency
- Notifications: Click here so you can turn on/off various notifications that you want to receive via the app or by email
- Group: Click here so you can assign the unit to a self-created group
- Location Frequency: here you can change the frequency of the Loca, so how often it should send a location
- Share location: allows you to share the last received location with others via WhatsApp, email, chat, etc.
- History: via this button you can view the locations from the past, the locations of the selected period are then shown on the map.
The functions are further explained below.
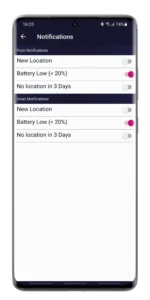
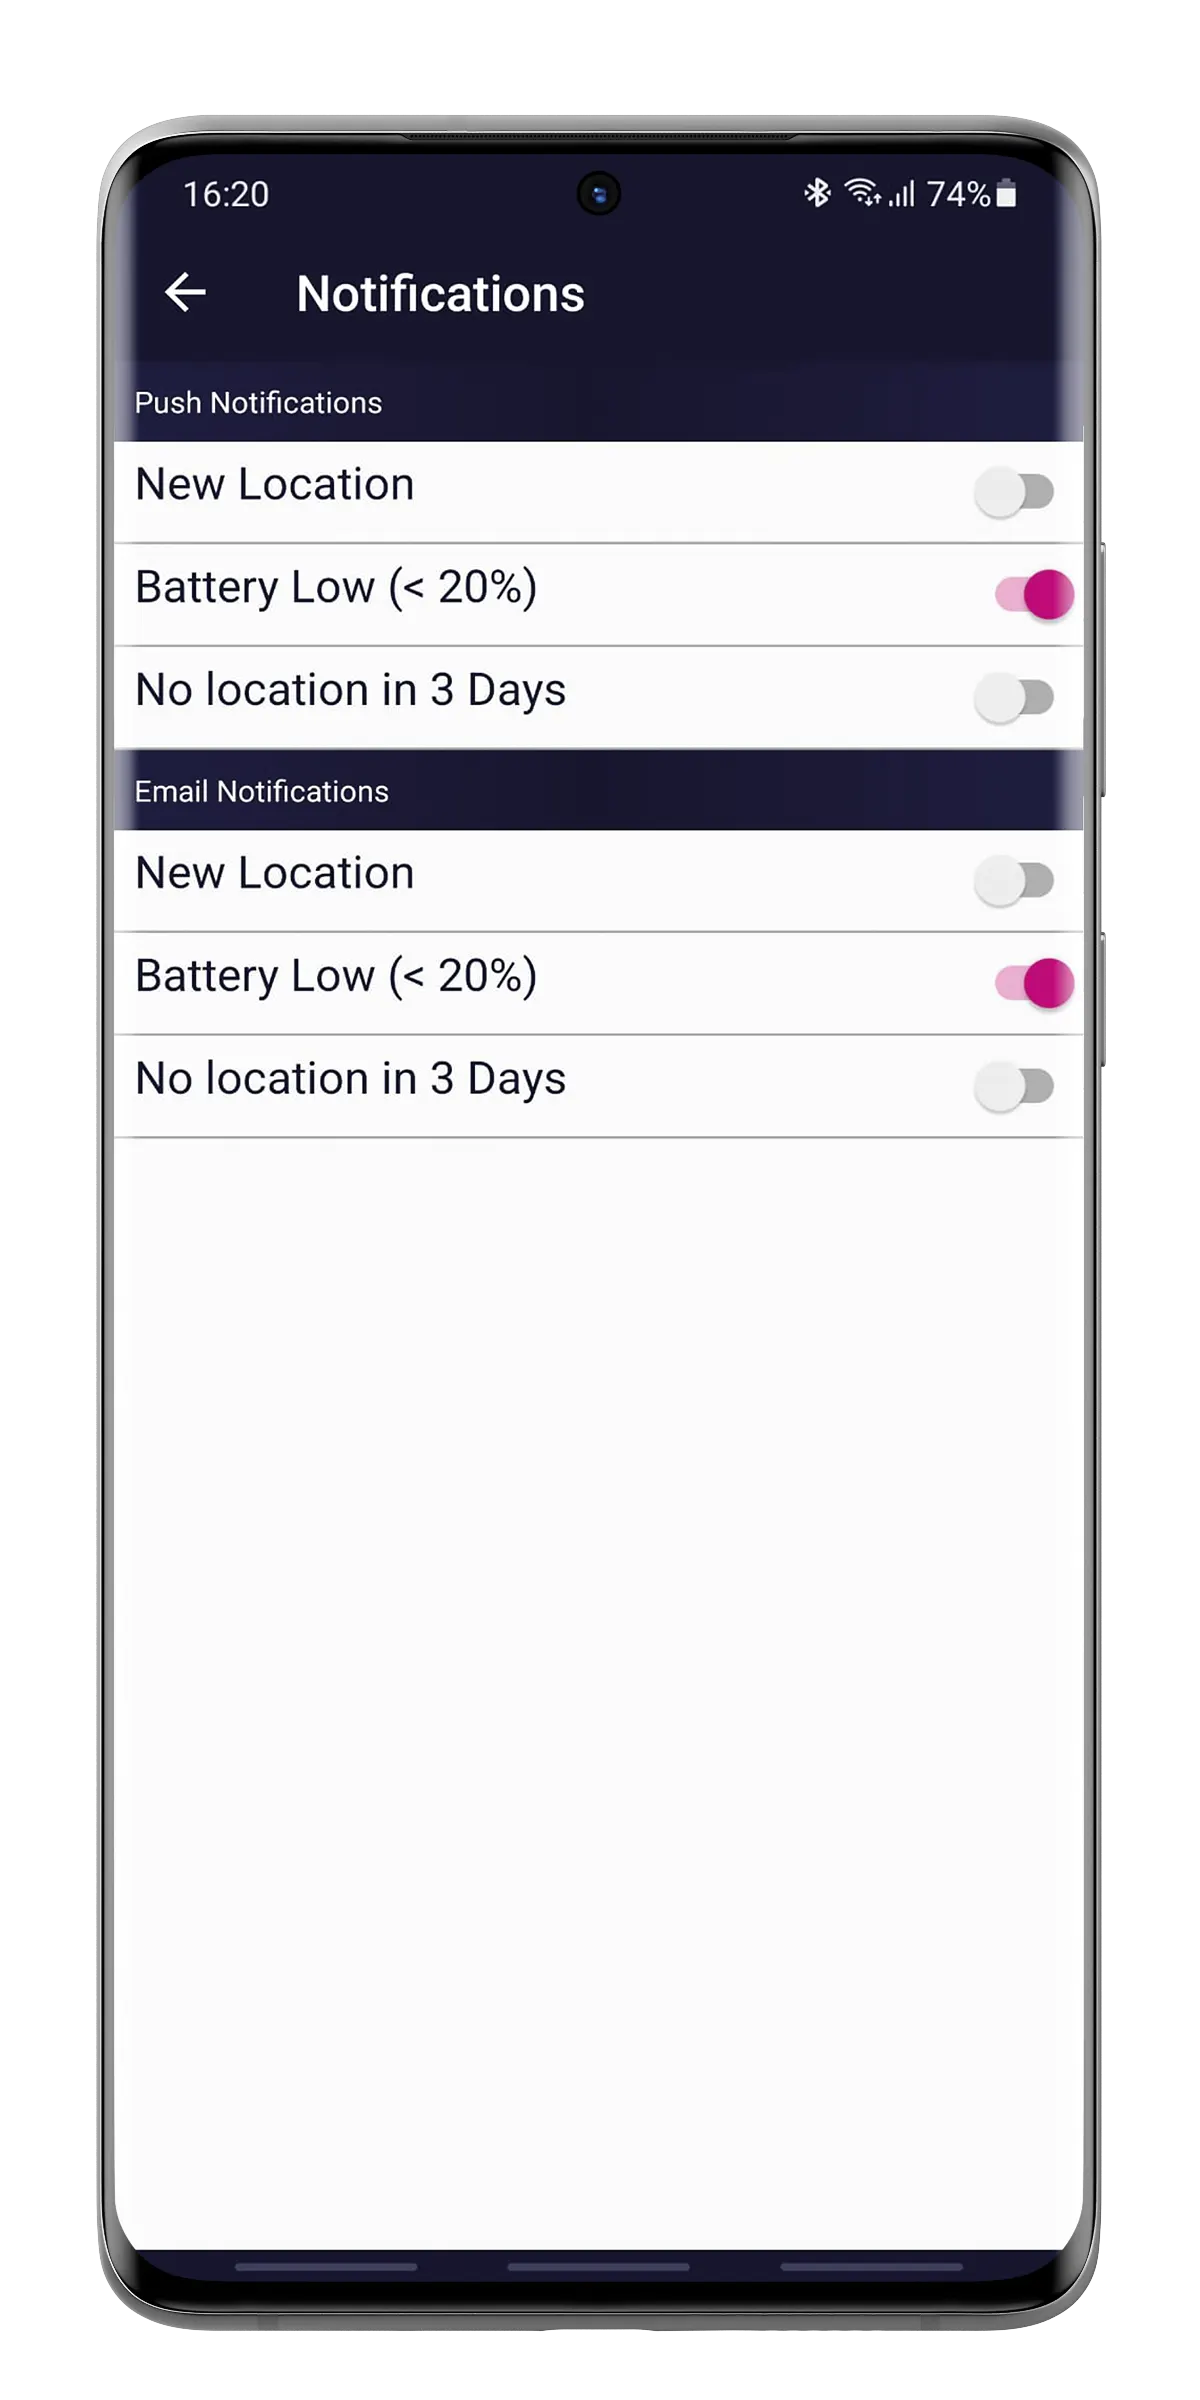
Notifications
Here you can set the different notifications that you want to receive via a Push message or E-mail.
With a Push message you will receive a notification on the smartphone on which the app is installed, you do not have to open the app separately.
To turn on a notification, slide the ball from left to right. If it turns pink, the notification is active.
- New Location: Get notified when a new location/position is received
- Battery Low(<20%): receive a notification when the battery drops below 20% so that you can replace the Loca in time.
- No location in 3 days: Receive a notification if no new location or position has been received by the Loca for 3 days. This way you know that there may be something wrong or that the Loca is in a place where there is no range. View tips here to check the range of your Loca.
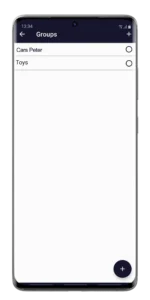
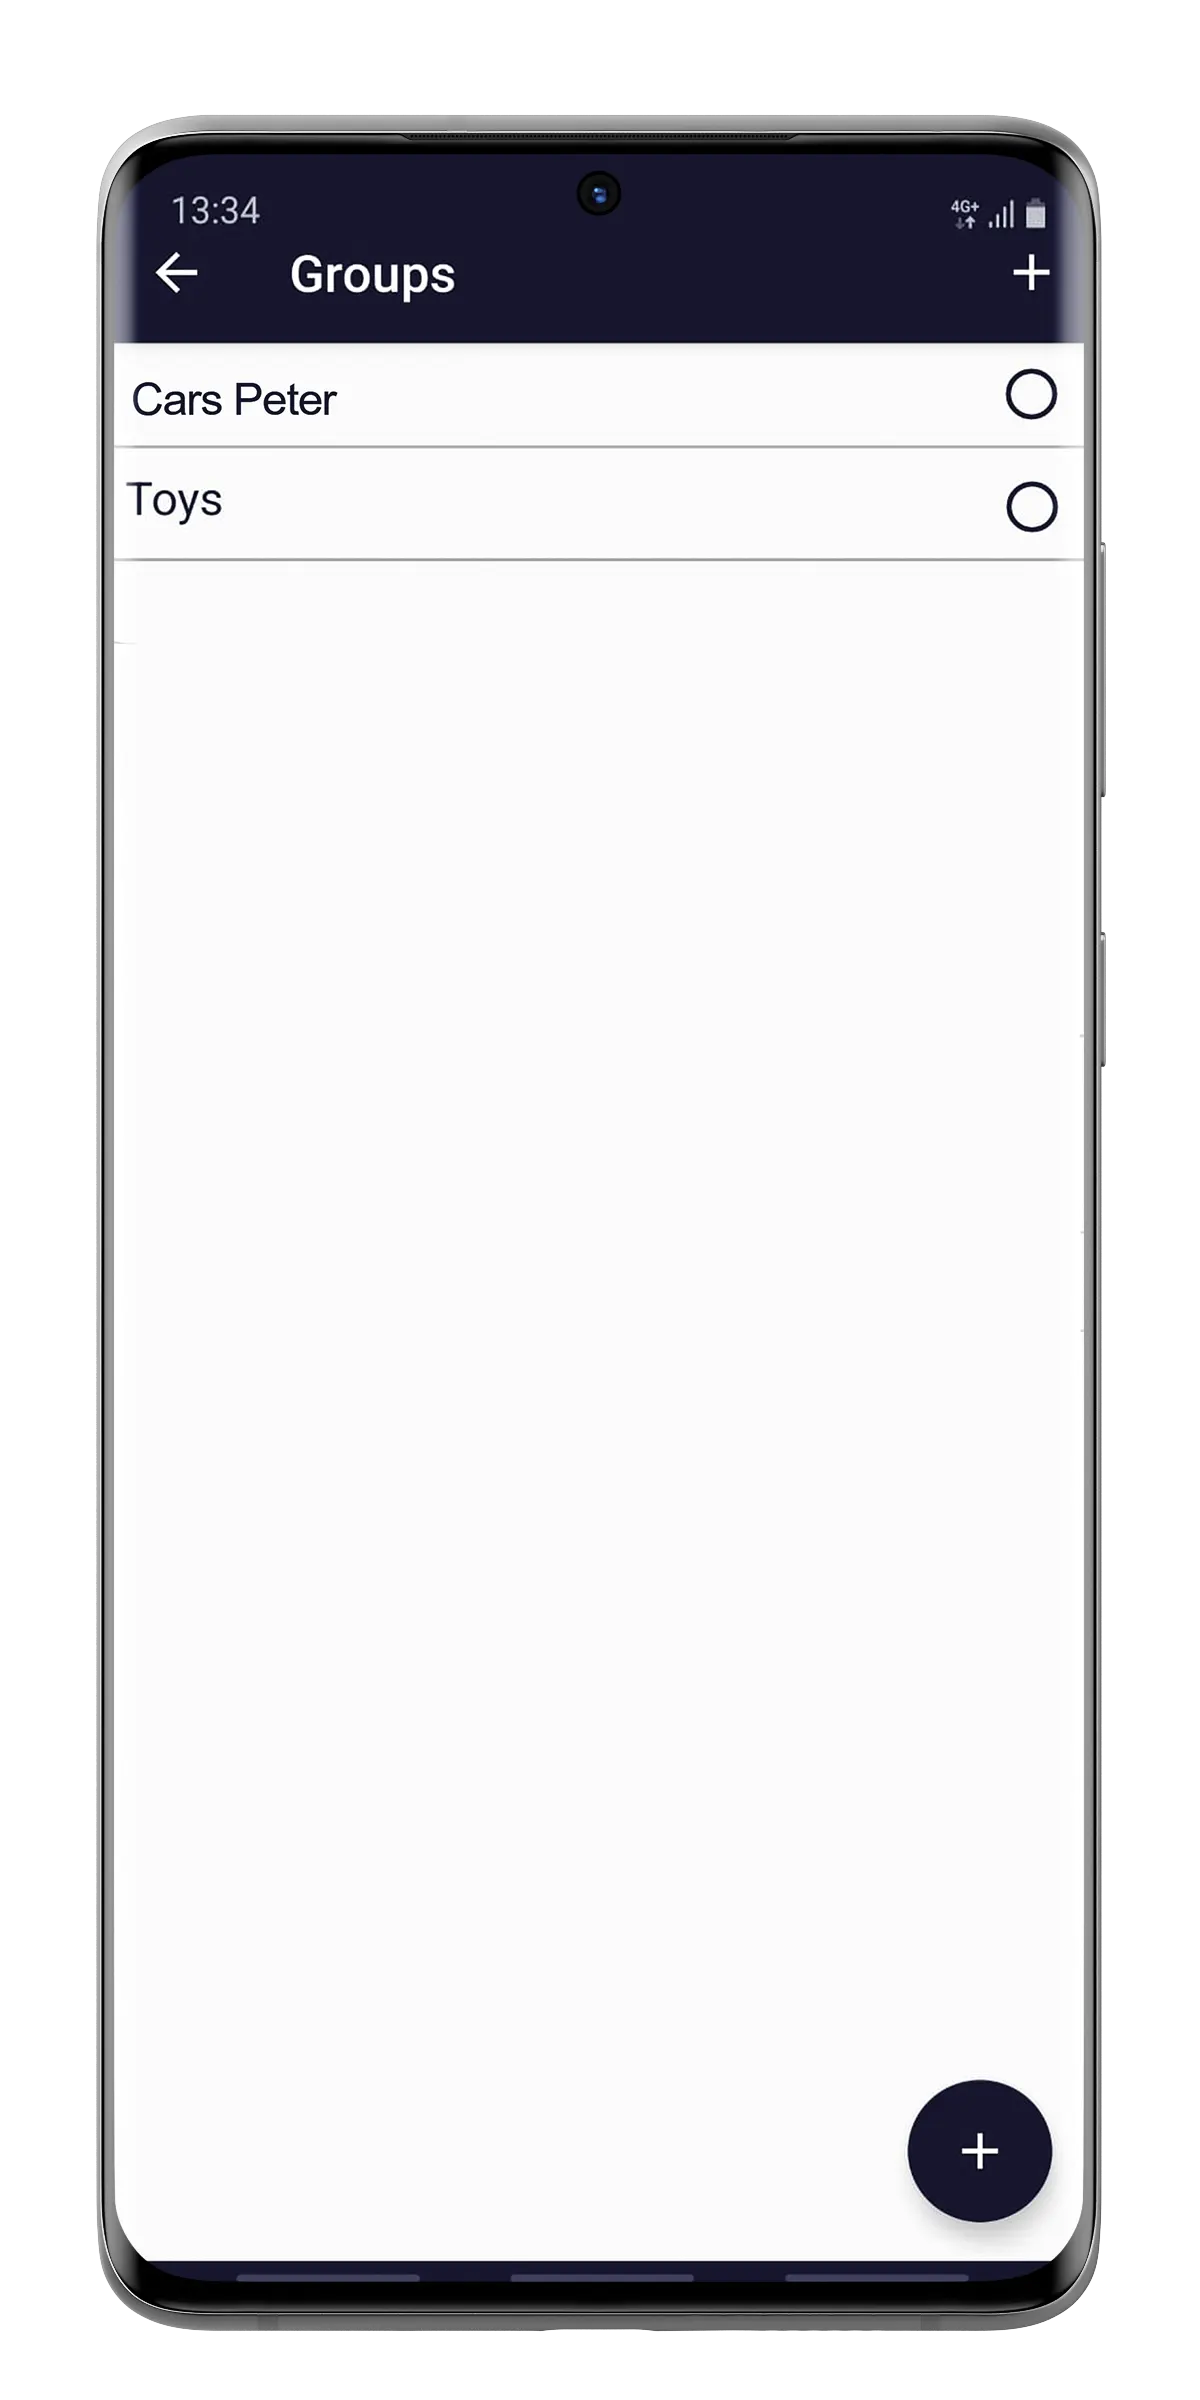
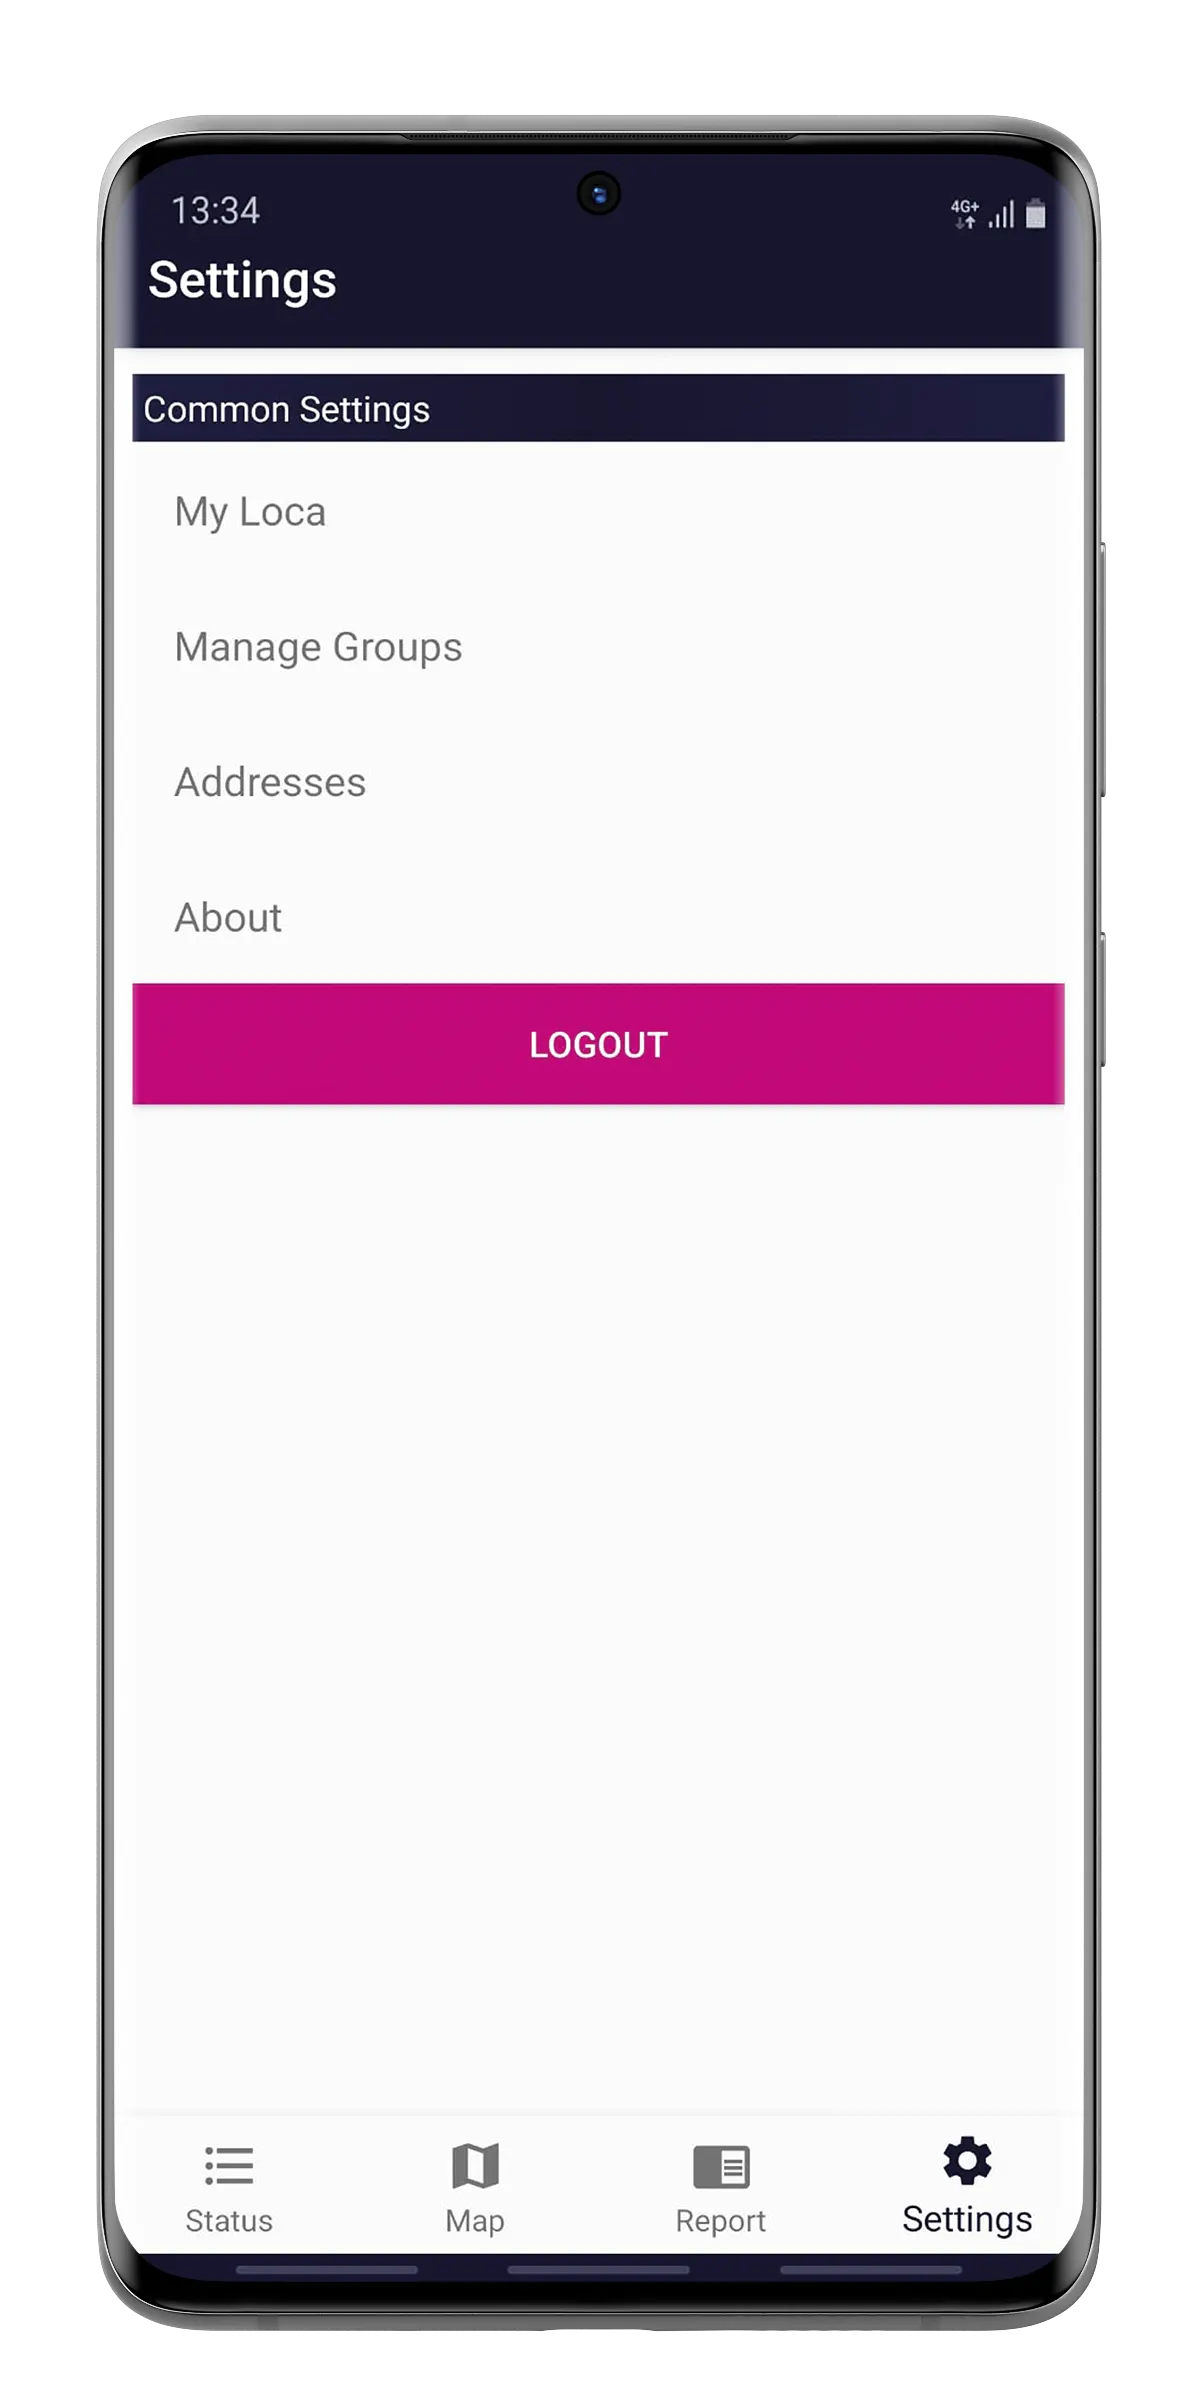
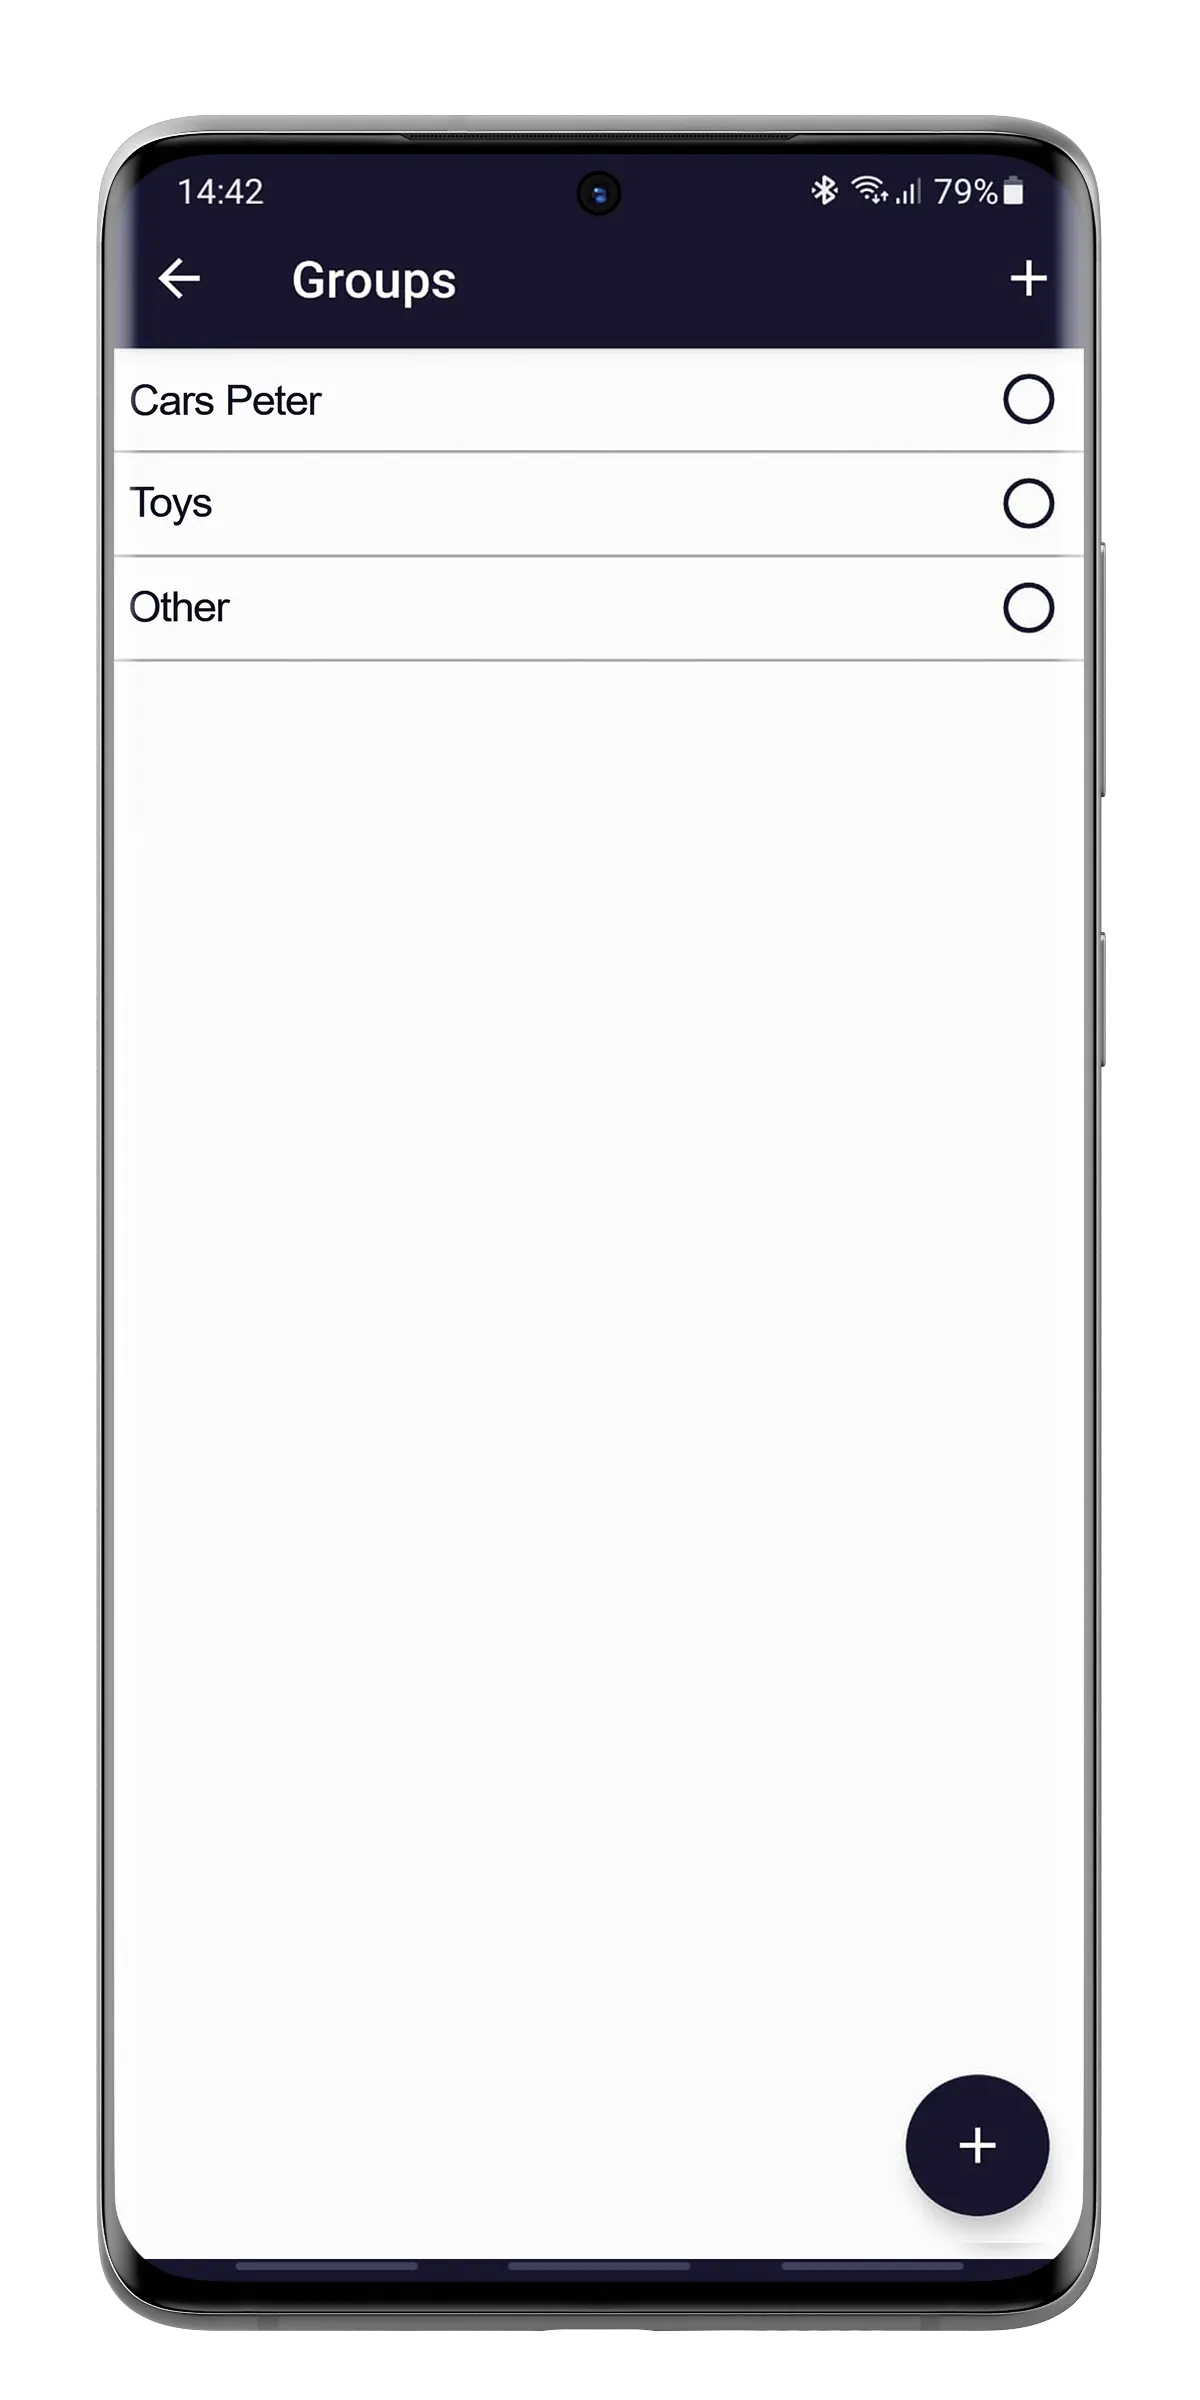
Group
In this screen you can assign your unit to a group, or create a new group.
- Check the desired group to which you want to add your unit.
- If you want to create a new group, click on the + icon in the top right or bottom right and enter the name of your group.
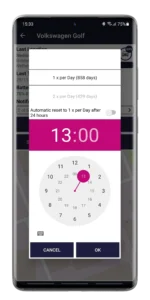
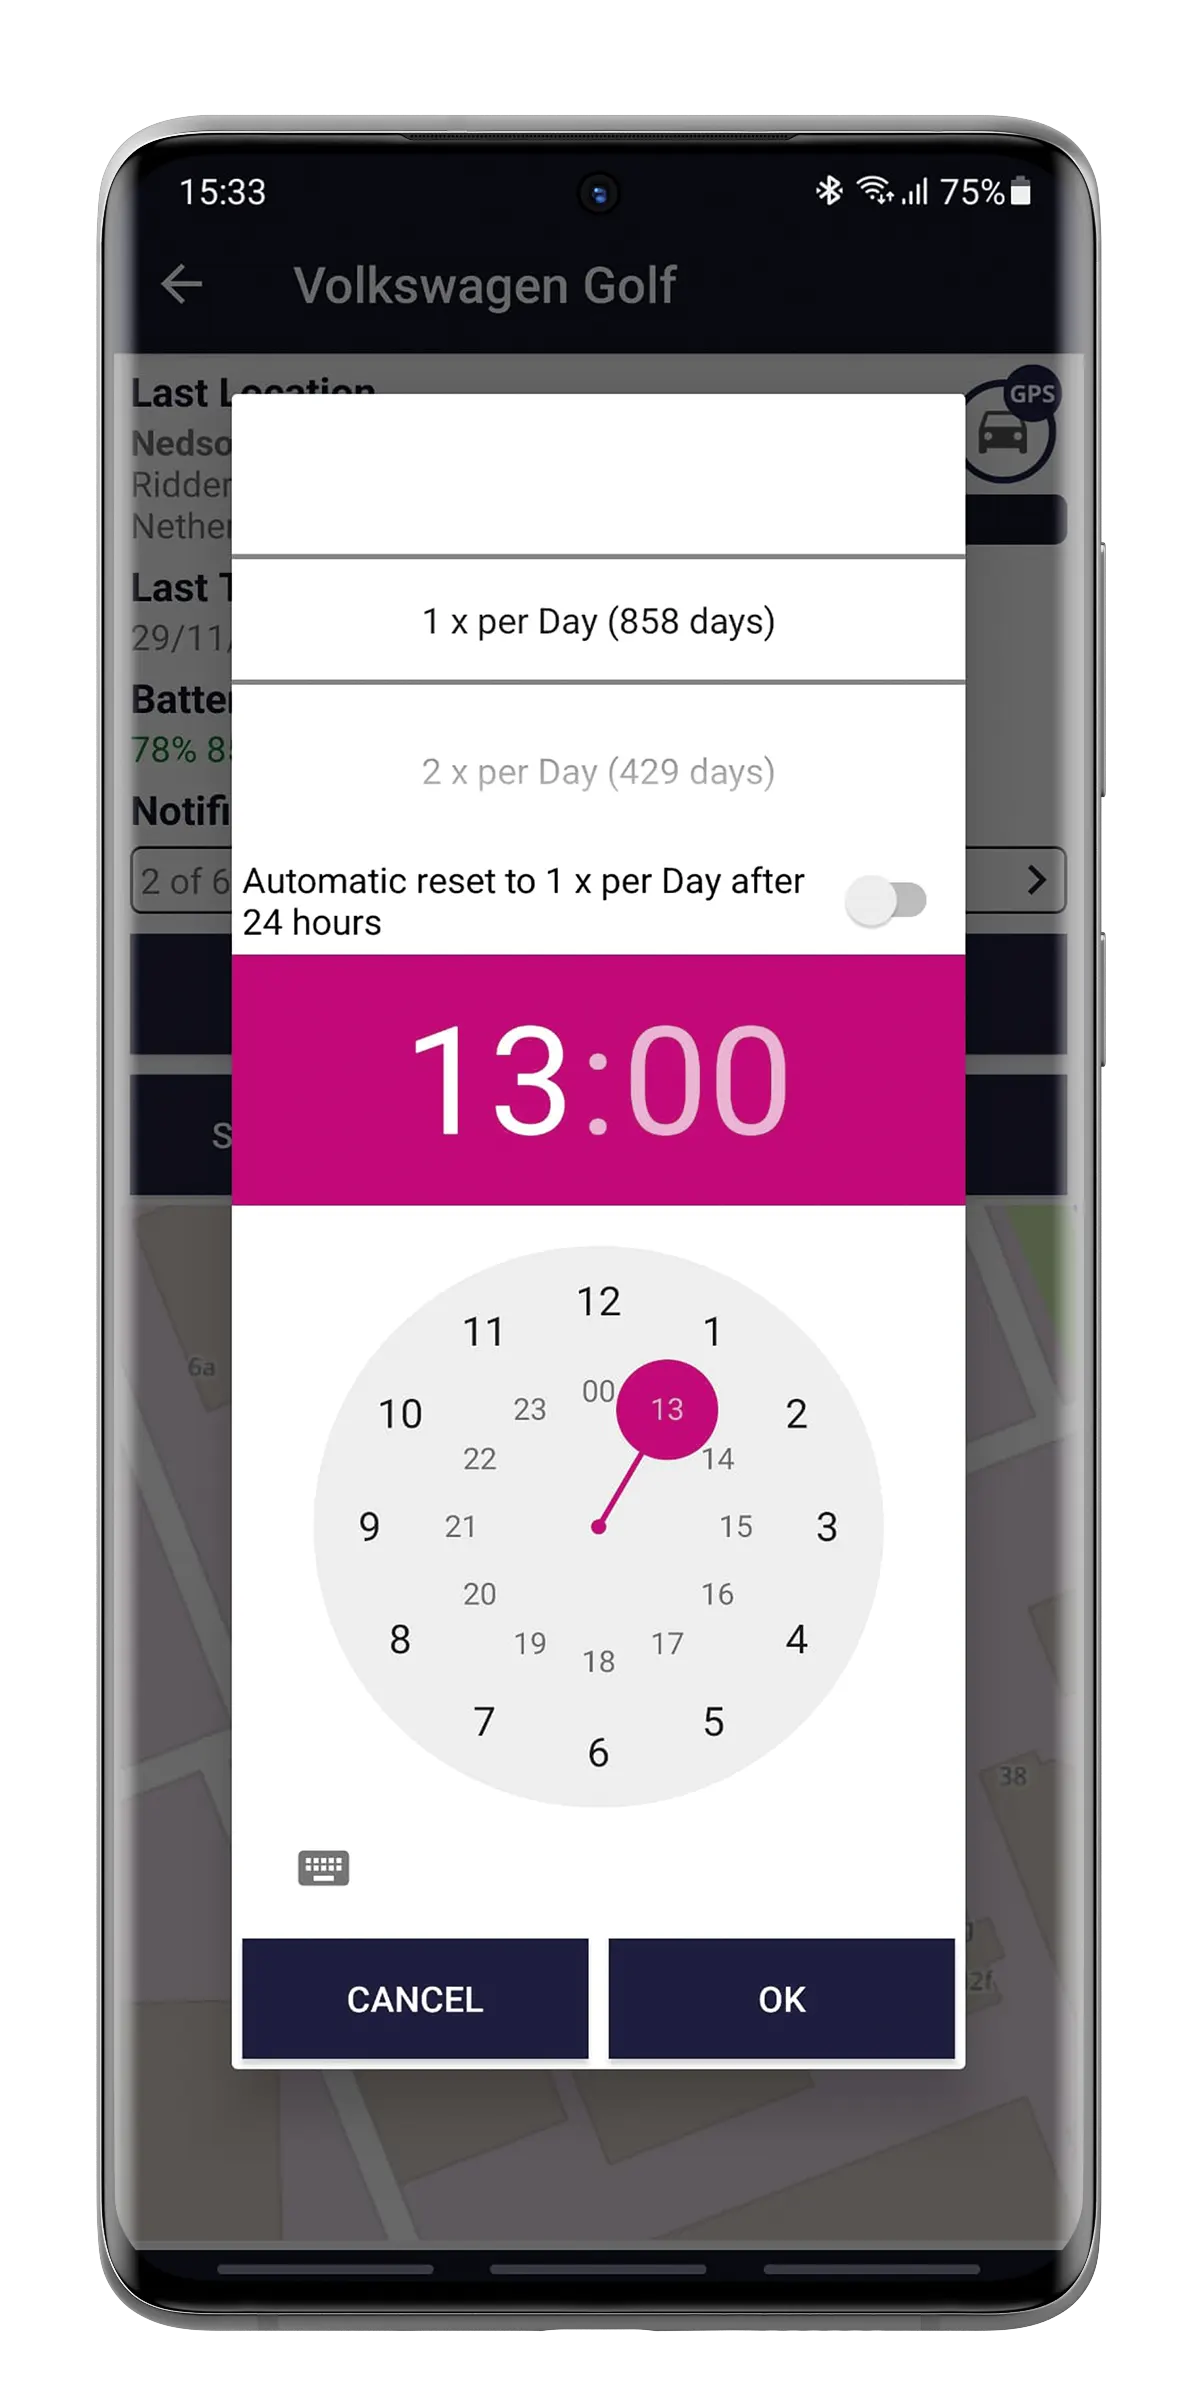
Adjust frequency
In this screen you can change the frequency and time at which you receive a location from your Loca.
- Frequency: behind each frequency you can see how long the battery of the unit lasts (in number of days).
- Automatic reset to 1x per Day after 24 hours: this option means that you can, for example, set the Loca to 1x per 10 minutes in the event of a calamity. Because the battery then runs out quickly, you can use this function to automatically reset the frequency to 1x a day after 24 hours. The more positions you want to receive, the less long the battery lasts.
- Time: here you can indicate what time you want to receive an update of the location, for example: 1x a day at 13.00.
When you change the frequency of your Loca, it will be processed at the next position received.
Example 1:
- You will receive a position 1x per day at 10:00 am.
- You adjust the frequency at 9:30 PM to “6x a day”, you want to receive the frequency at 10:00 AM.
- You will then receive a new location every 4 hours from 10 a.m. the next day.
Example 2:
- You will receive a position 1x per day at 10:00 am.
- You adjust the frequency at 9:30 PM to “6x a day”, you want to receive the frequency at 9:00 AM.
- Your setting will then be processed at 10:00 AM the next day.
- The next day at 9:00 AM, you will receive a new location every 4 hours.
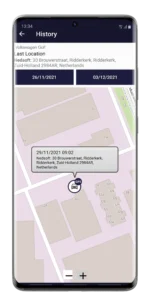
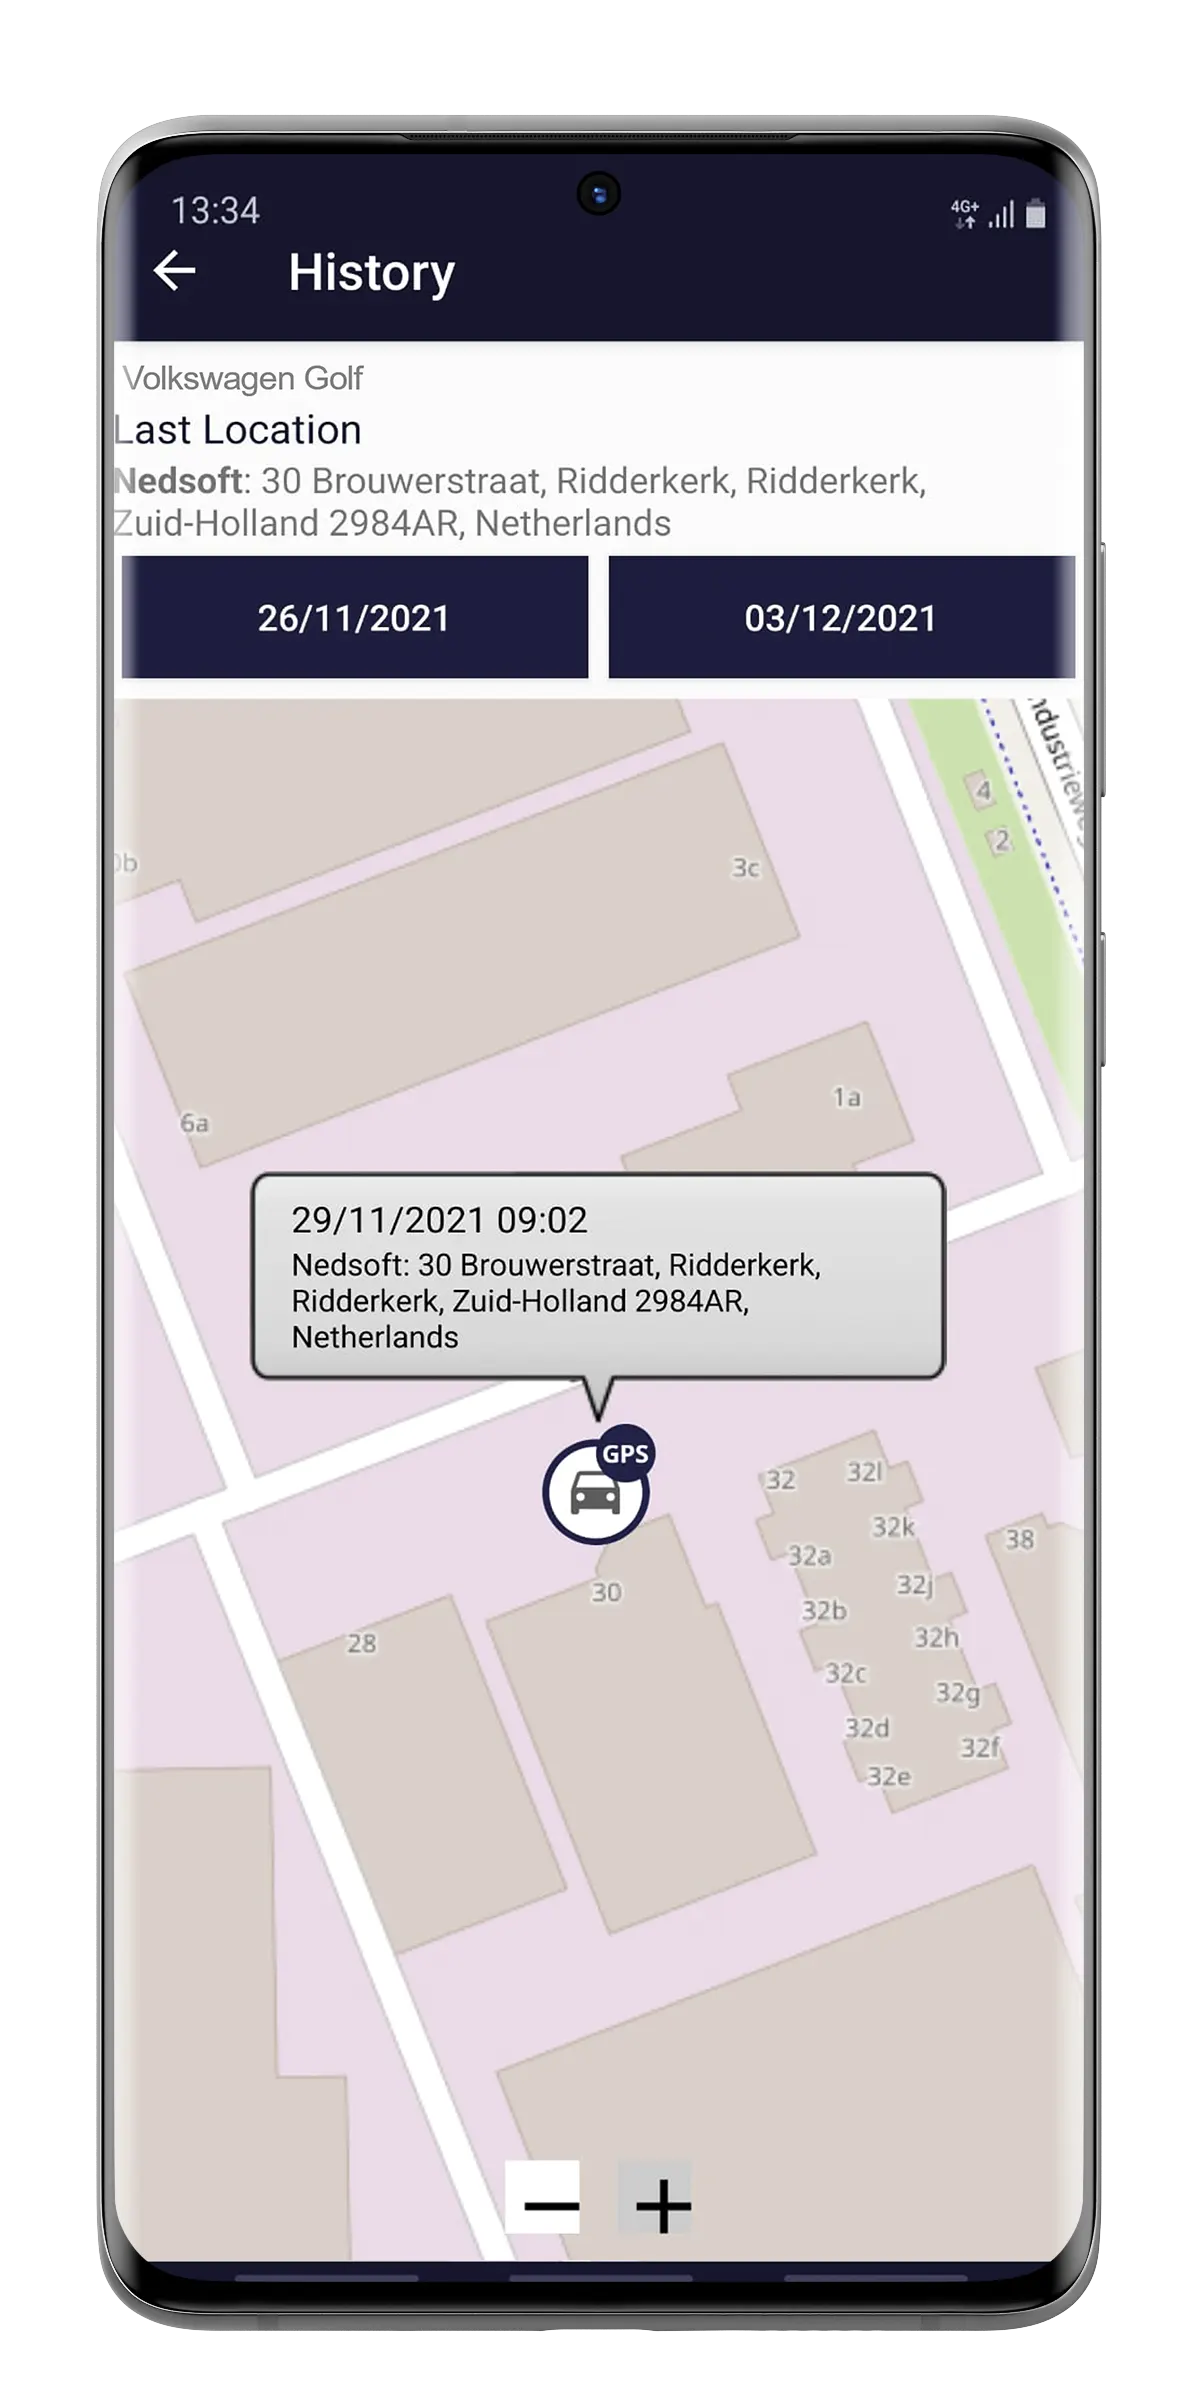
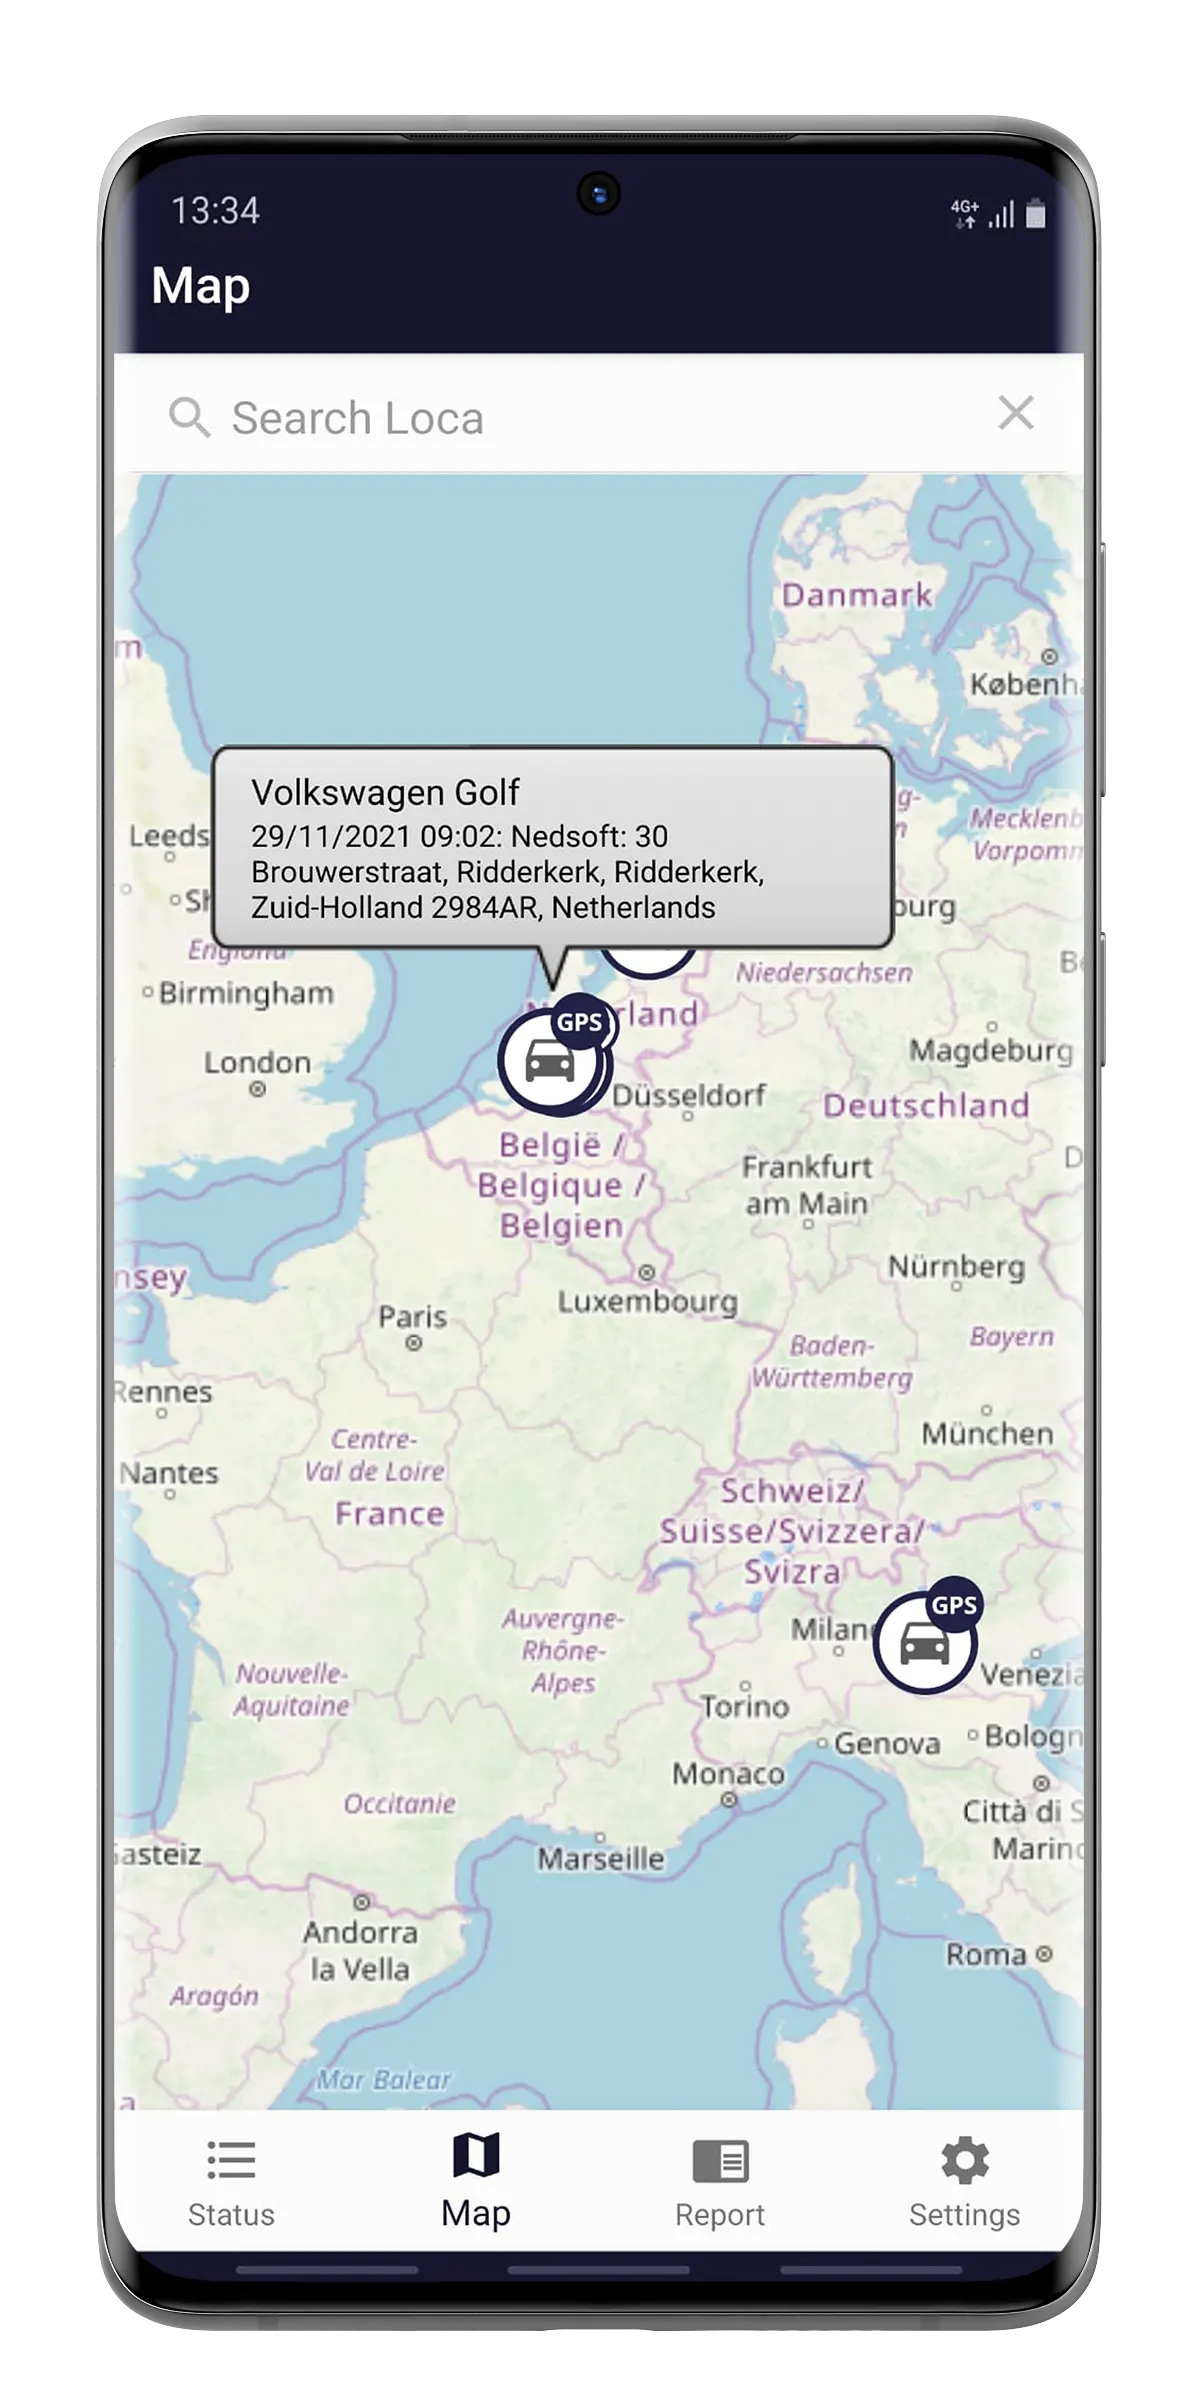
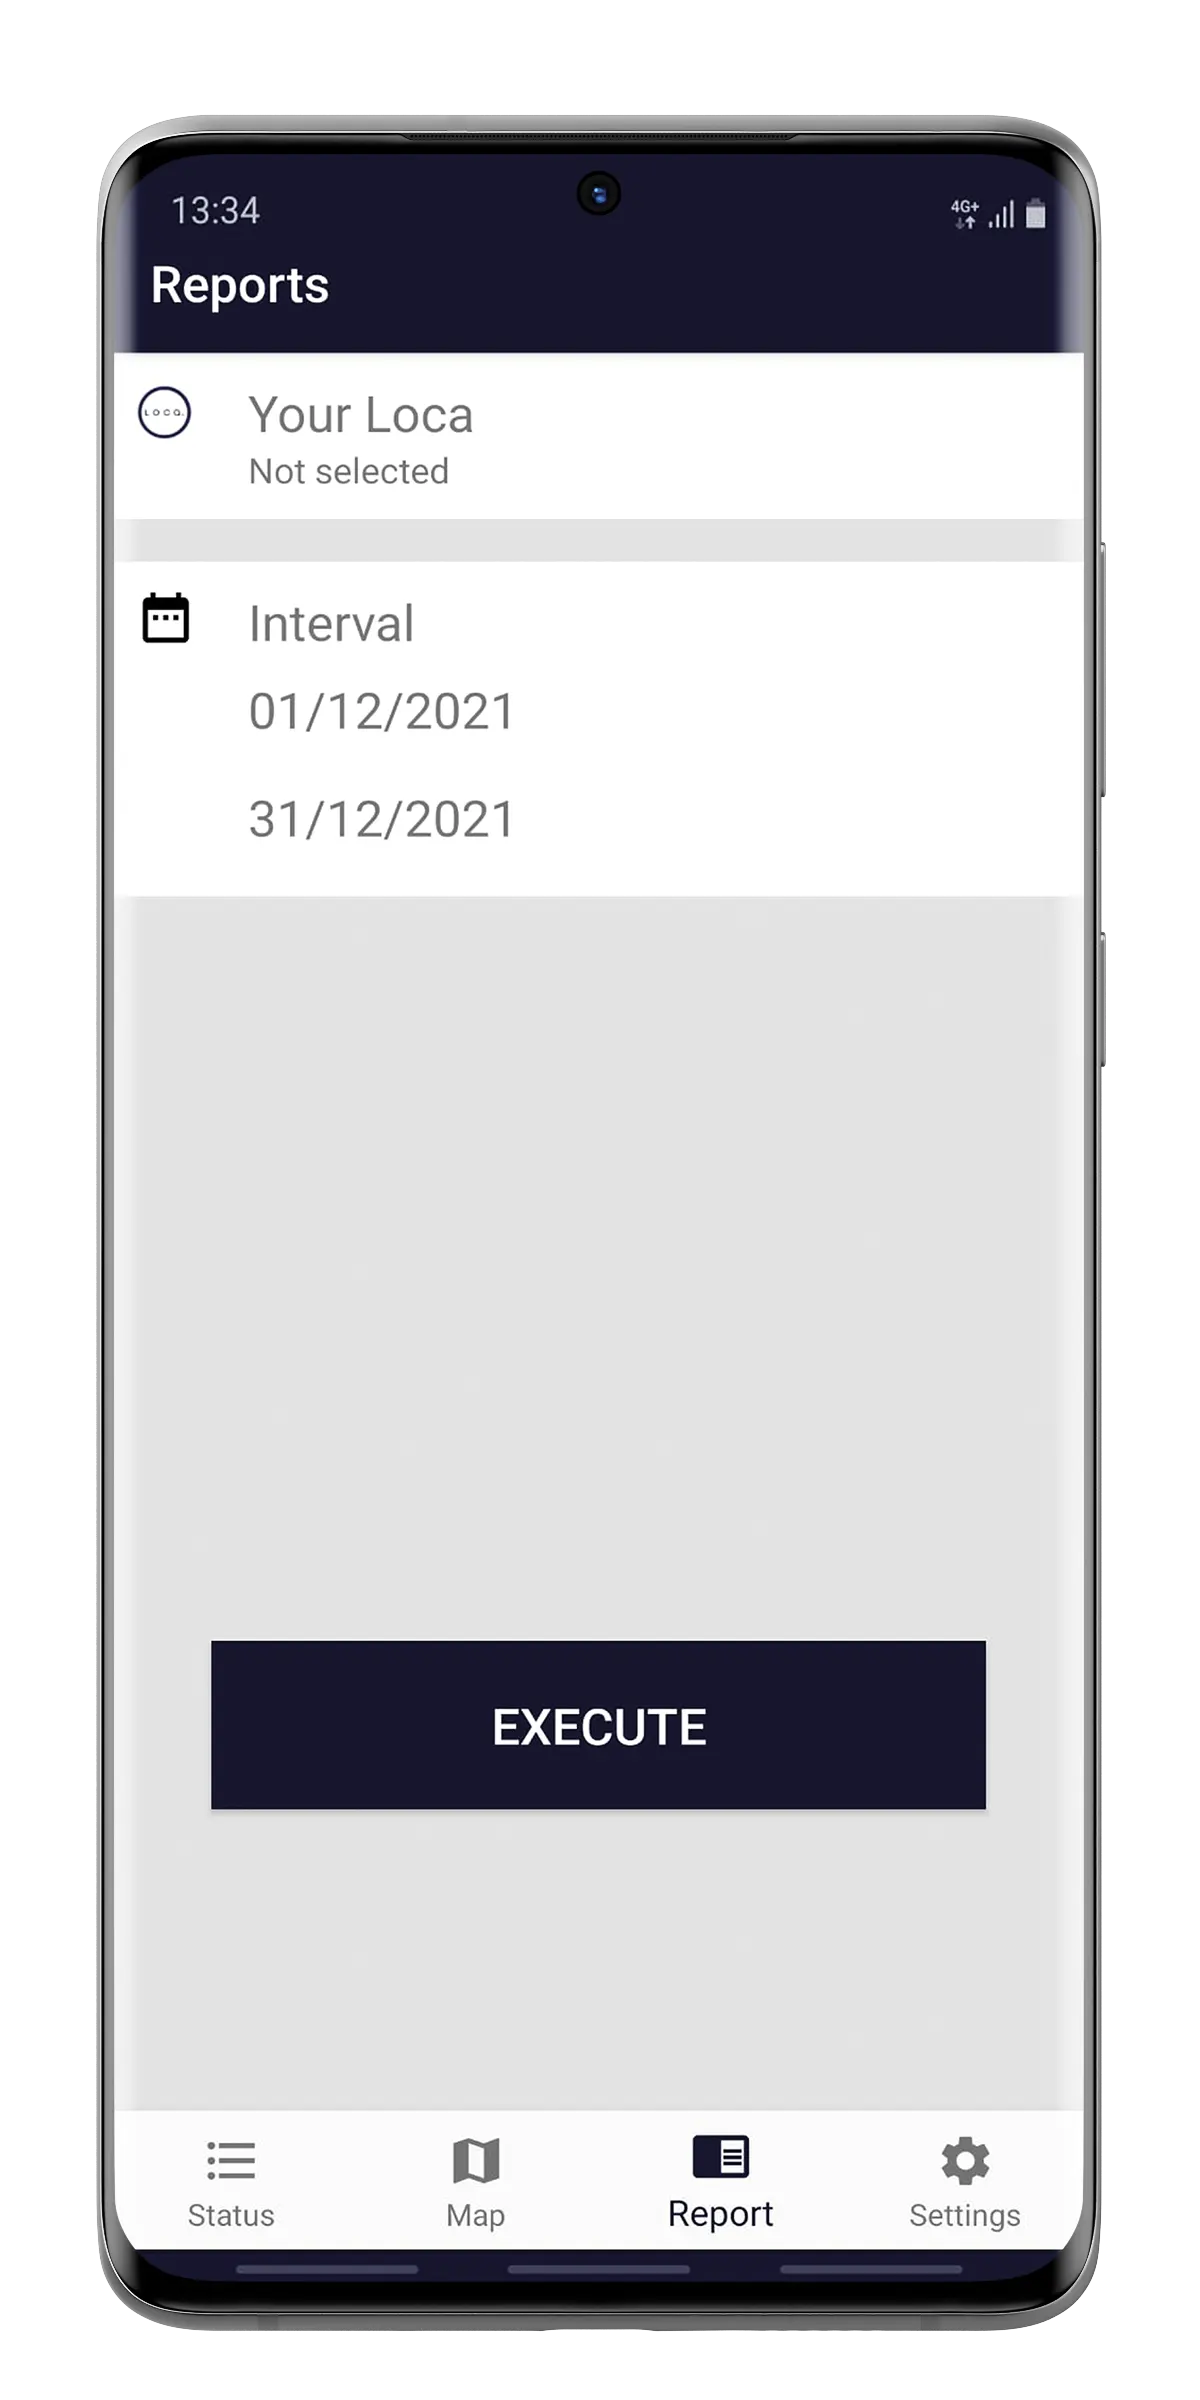
History
In this screen you can view the history of your units:
- Choose the desired period, all locations will be shown on the map.
- Click on an icon on the map to see the details of that location.
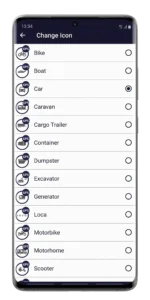
Change icon
If you clicked on the icon from the detail screen you can choose a matching icon, such as a car, motorcycle, boat or container.
That way you can see, for example, faster on the map or in the overview which unit it concerns, or what you use the unit for.
The GPS icon is automatically changed to an LBS icon, as soon as the Loca cannot receive a GPS signal. Read more about the difference between GPS and LBS here.
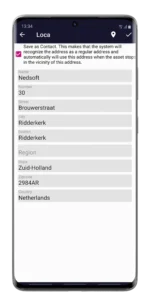
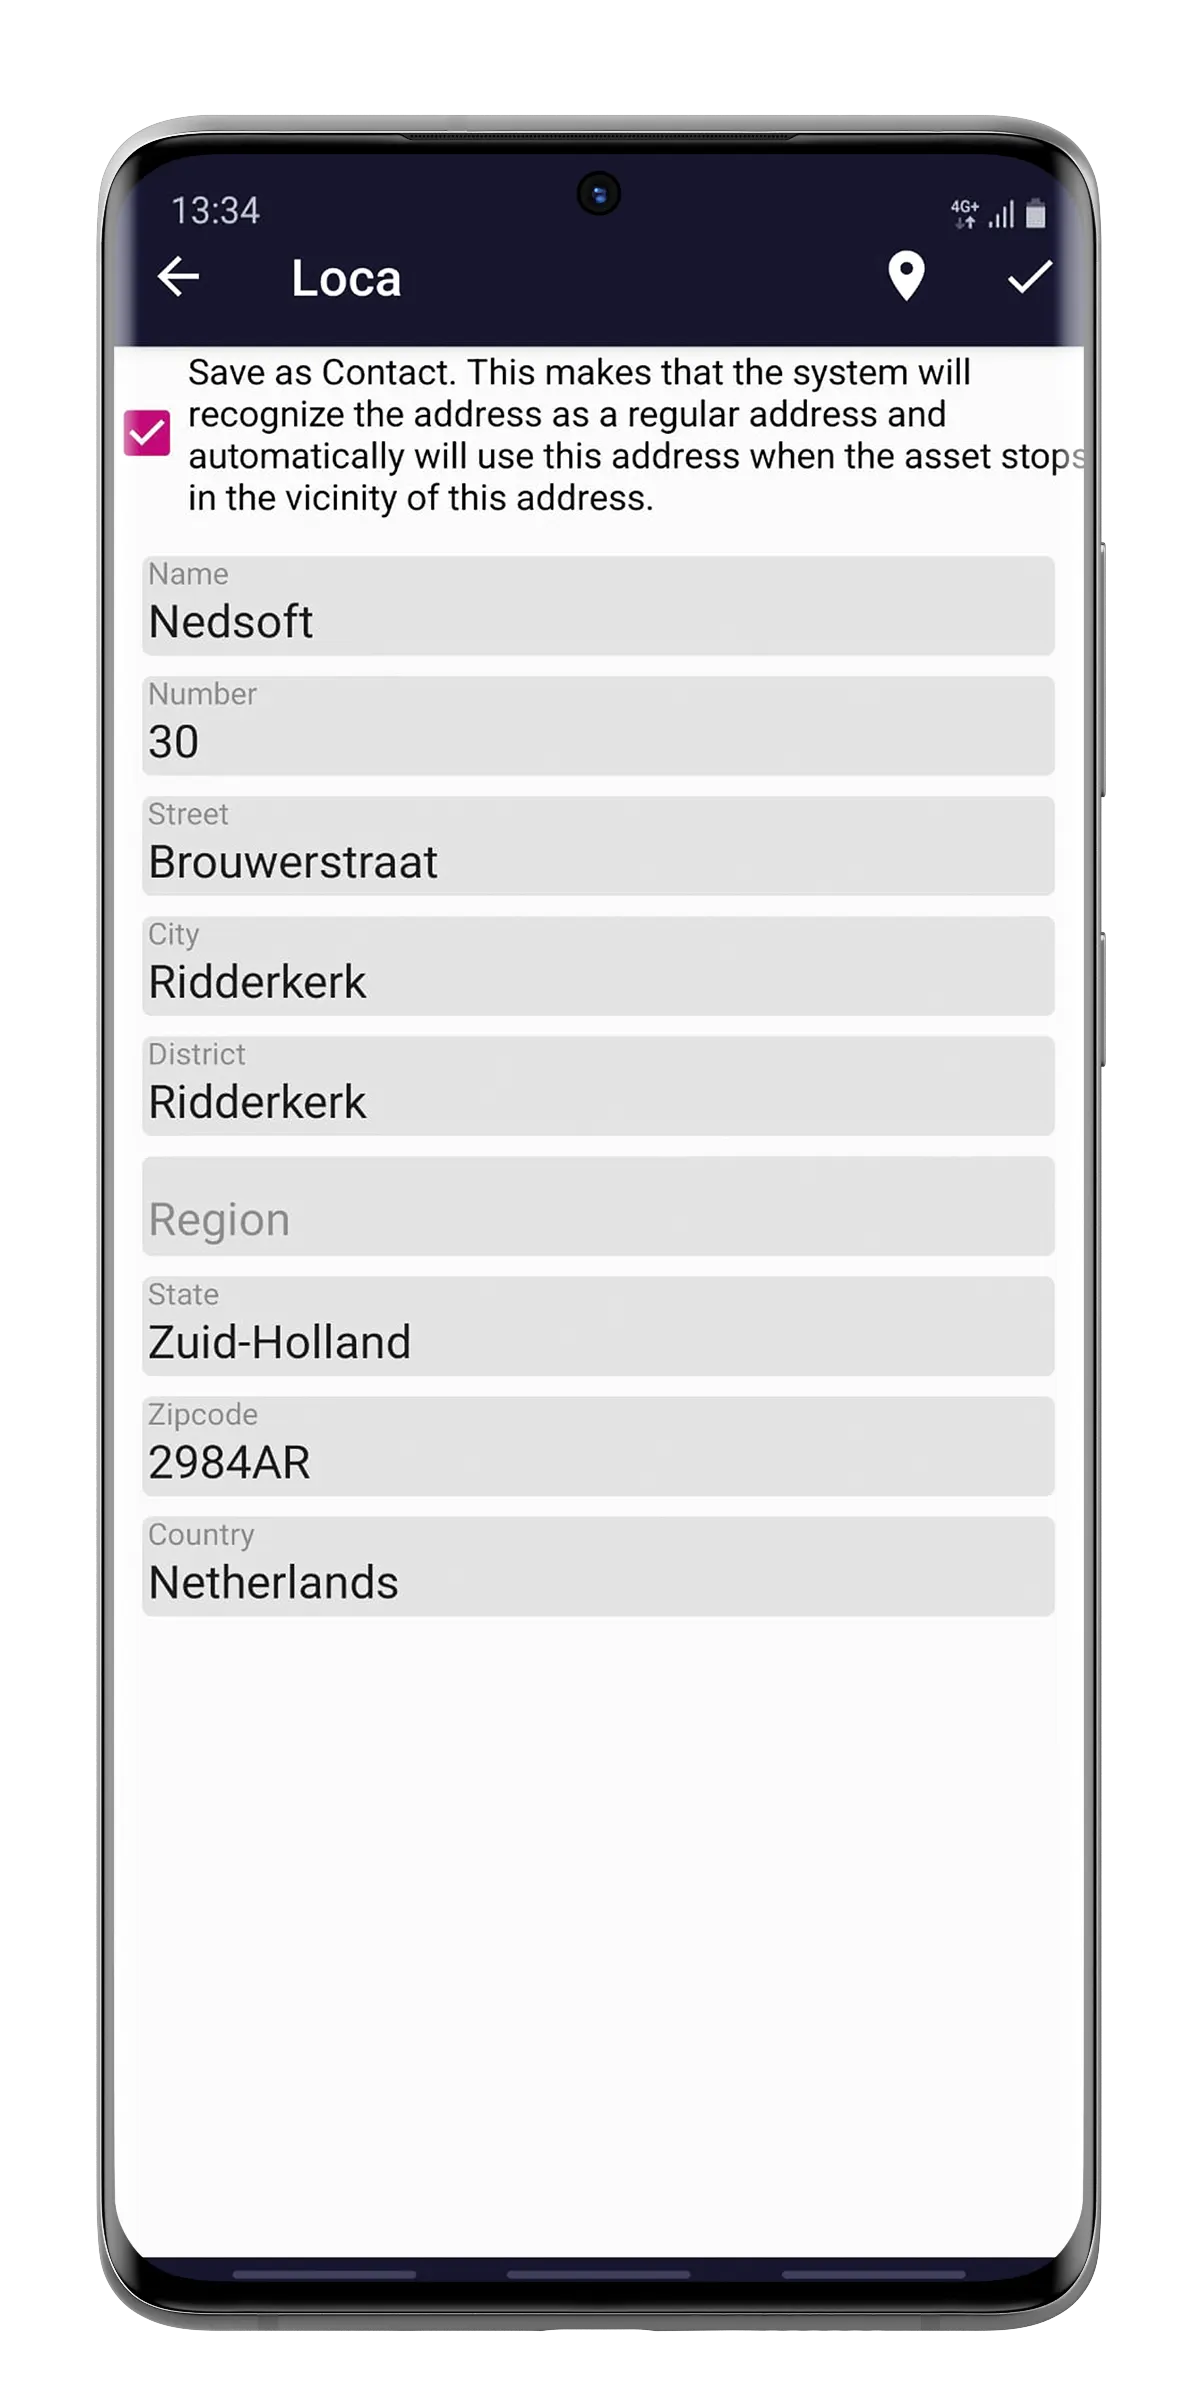
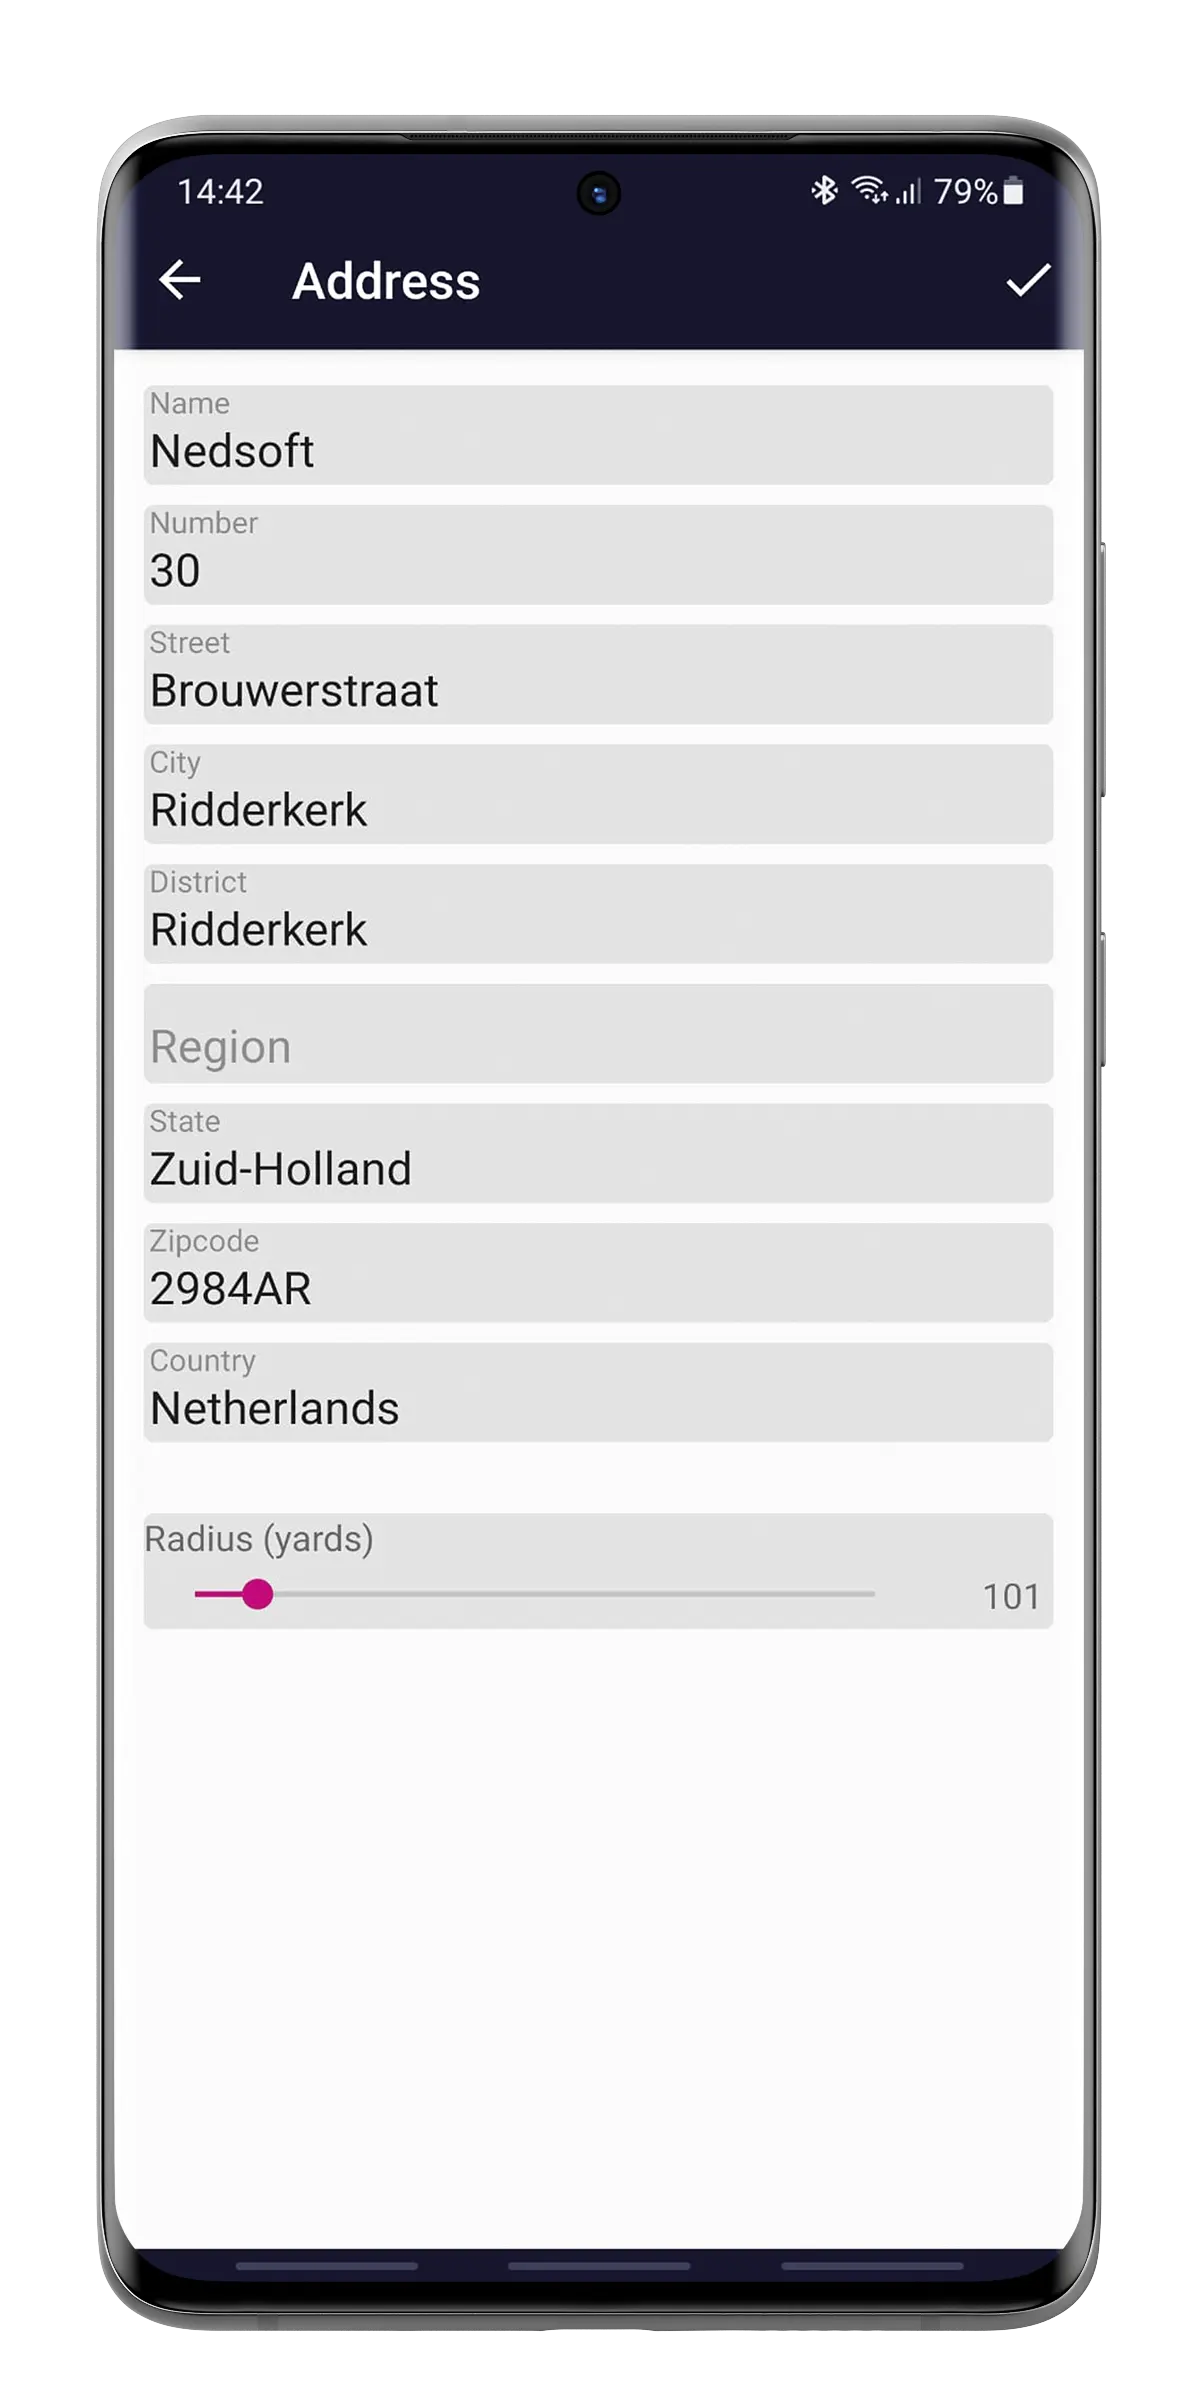
Create location
In this screen you can make a fixed address of a received location. This allows you to enter a company name or other name, for example.
The system then automatically recognizes when a location is received within a certain radius, and will complete the data you have entered, such as a name or house number. Via Settings > Addresses you can specify a radius per set address. The radius is the radius in which the location must be before the data will be supplemented or modified.
This setting is convenient, for example, when an object is at an intersection and displays a different address each time. If you create a Location for this, you will now see the same address, possibly with a name.